Chris Craft Rebuild
Page 2
Week Three
Repair of the Keel.
|
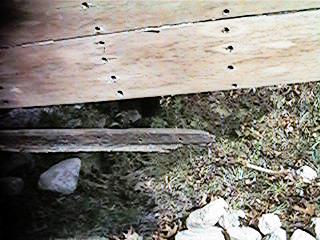
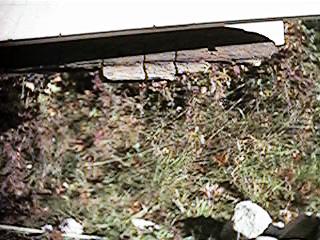
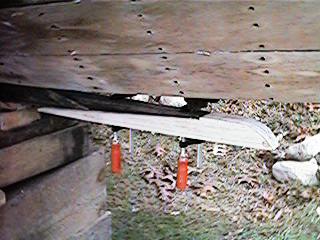
The removal of the garboard planks and the inner planking reveals the deterioration of the wood around the stopwater. The picture on the right is after removal of the forefoot. This is what is left of the forward end of the keel.
|
|
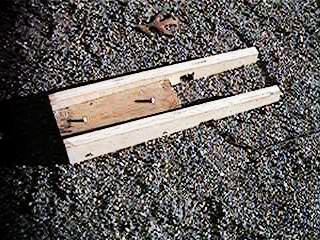
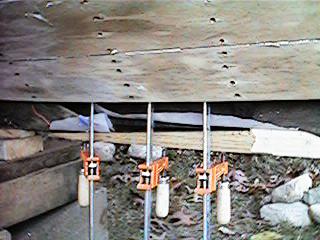
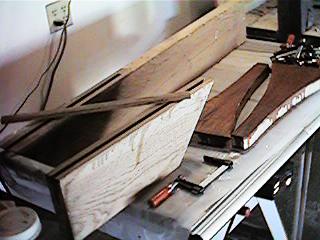
A new section of keel would have to be installed to replace the missing wood. To make the maximum strength in the glue joint a 1:12 ratio scarph would be needed. I built a scarphing jig to cut off the decayed and crumbling wood. The picture on the left shows the jig. The sides are plywood screwed to a 2X4. All of the edges are squared to make sure the slope across the gap was even. The dowles shown fit into the bolt holes on the keel and are used for registration and prevent slipping fore and aft.. On the right the picture shows the jig in place. If you look carefully you can see the keel section to be cut below the shadow.
|
|
The left picture below shows the initial cuts made in the keel for quick removal of excess wood. Cut up to the jig but not into it. Then remove the sections between the cuts with a chisel. I used a router to cut the scarph using the edges of the jig as a guide. |
|
I ended up extending the length of the jig to get to the end near the blocking at the aft end of the scarph. Sheetrock screws work great for temporary things like jigs. To the right, the scarph after a little cleanup with a block plane. The little block of wood at the forward end of the keel at the frame is to protect the keel from excess movement. After this I liberally applied the Smith's Penetrating Epoxy (CPES) to the entire scarph and the top of the keel. This will stop any rot from restarting and give glue a good hold to the wood.
|
|
I always dry fit wood before gluing. The new keel piece was cut using the 1:12 scarph and making sure the grain direction was the same as the keel. I used the forefoot as the pattern for the rounded shape forward that was removed.
|
|
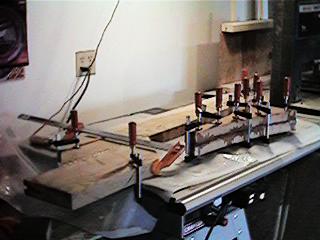
A little CPES on the glue surface of the new piece shows the grain where the untreated side washes out the camera. Again I used the bolts in the holes to align the new piece to the keel. The right shows the scarph as it is glued. The white paper is actually 6 mil clear plastic used to stop the glue from getting where it doesn't need to be. The keel was glued with the forefoot in place to act as a backing block for even clamp pressure and for alignment by the bolt holes. To prevent the bolts from getting glued in I applied butcher wax to the bolts. They came out without too much fuss. |
Week Four
New Stem Fabrication
|
While the above keel work was in process I cut out the new stem. Basically I needed the wood for the keel and I wanted to optimize the lumber to get the stem and the keel head out of the same piece. The wood I got had a natural curve to the grain and I used it to help . |
|
I like to glue up lots of stuff all at the same time. Sort of get it over with. The new piece of wood for the forefoot wasn't wide enough. So I splined and glued to sections together. The left glue up in the picture shows the new forefoot lumber, on the right is the new bullnose being glued. Previously I applied CPES to all glue surfaces, When the CPES has dried, I used the All Wood Glue to adhear the sections. Once again the plastic collects glue drips and stops the wood from being glued to the furniture. I always do a dry run to make sure I have all of the clamps handy. There is nothing worse than rumaging around looking for a clamp when your hands are full of glue. |
|
|
|
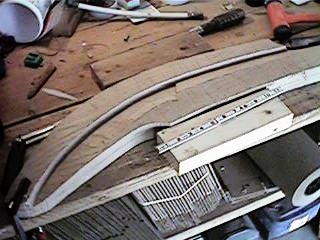
While the glue was curing I started re-creating the stem. Using a ruler and the triangle I drew lines across the rabbit. Each line was 1" from the other. I started from the nub on the inside edge at the top of the curve. From this line I mark off 1" intervals to the right and left along the inner edge. The triangle lip followed the curve of the inside edge and a line drawn at every 1" tick mark. As long as the lines are in the same place on both the old and new stem the rabbit can be measured. |
|
Numbering the lines on both stems reduced confusion. Using the compass I transferred the distance from the inside edge to the sides of the rabbit. Finally using a batton I connected the dots. |
|
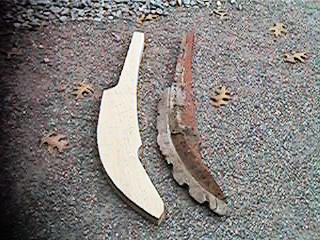
The end lines were transferred using the pattern method. I traced the end of the rabbit from the old stem onto a medium weight card stock. Cutting along the pencil line gave me the male pattern. This pattern was placed on the end of the new stock and traced along it's edges. The result is on the left. I created a rabbit guage with a piece of 1/2" plywood twice as high as the rabbit and twice as long. On the old stem I measured the depth on one edge and length on the other. Another piece of plywood was used a guide for the chisel to start the short edge of the rabbit. On the right is the carved rabbit. |
Week Five
New forefoot and Fitting it to the stem
Email this article to a friend.
This article is sponsored by:
Star Distributing